

Table of Contents
- What You'll Need to Brew Pour Over Coffee While Camping
- Coffee Grind Size for Pour-Over at Camp
- Getting the Camp Pour-Over Coffee Ratio Right
- Step-by-Step Brewing Instructions Over a Camp Stove
- Choosing a Portable Pour-Over Coffee Maker for Camping
- How to Clean a Camping Coffee Dripper in the Field
- Troubleshooting Common Pour-Over Problems at Camp
- Frequently Asked Questions
Last Updated: November 2, 2026
What You'll Need to Brew Pour Over Coffee While Camping
Making pour over coffee camping requires just a few essential pieces of gear, most of it fits in a small bag and weighs almost nothing.
Essential Brewing Equipment
A portable pour-over dripper is your foundation, collapsible designs pack flat, so look for something lightweight and durable. You'll also need a gooseneck kettle or any pot with a spout that controls water flow; a slow, steady pour matters more than the container itself.
Here's what to pack:
- Pour-over dripper (collapsible model preferred for camping)
- Gooseneck kettle or standard camping pot with spout
- Filter paper (bring extras)
- Mug or cup (the Reel Good Enamel Mug works great for this)
- Thermometer (optional but helpful for water temperature)
- Carabiner or clip to hang your dripper over the mug
Without a grinder, the basic kit usually stays under two pounds. Everything fits in a stuff sack.

Coffee and Water Preparation
Bring freshly roasted, whole beans if possible, and grind them at home or right before brewing at camp. Fresh coffee tastes better, and the ritual keeps you sharp on early mornings.
Water quality matters more than most people realize. If you're camping near a stream, filter or boil the water first, sediment and minerals affect extraction and flavor. Potable campsite water works fine.
Coffee Grind Size for Pour-Over at Camp
Grind size determines extraction speed and flavor. For pour-over, aim for medium-fine, think sand, not powder.
A burr grinder gives you the most control. Blade grinders work but produce uneven particle size. At camp, a hand-crank burr grinder is lightweight and reliable.
Medium-fine grind typically brews in three to four minutes, balancing extraction and speed. Coarser grinds brew faster but taste weaker; finer grinds extract more flavor but risk bitterness.
Getting the Camp Pour-Over Coffee Ratio Right
The pour over coffee camping ratio is simple: one part coffee to sixteen parts water by weight.
This ratio works for most people, but adjust to taste: strong coffee drinkers go one to fourteen, light coffee drinkers prefer one to eighteen.
Here's a quick reference:
| Cup Size | Coffee | Water |
|---|---|---|
| 8 oz | 0.5 oz (about 3 tbsp ground) | 8 oz |
| 12 oz | 0.75 oz (about 4.5 tbsp ground) | 12 oz |
| 16 oz | 1 oz (about 6 tbsp ground) | 16 oz |
Measure your coffee first, then add water in stages during brewing for control over extraction. At Reel Good Coffee, we recommend starting with this ratio and adjusting to your preference on your next trip. If you like a bold cup, try it with Barracuda Bold, our dark French roast.

Step-by-Step Brewing Instructions Over a Camp Stove
Brewing pour over coffee while camping follows the same principles as home brewing, adapted for outdoor conditions.
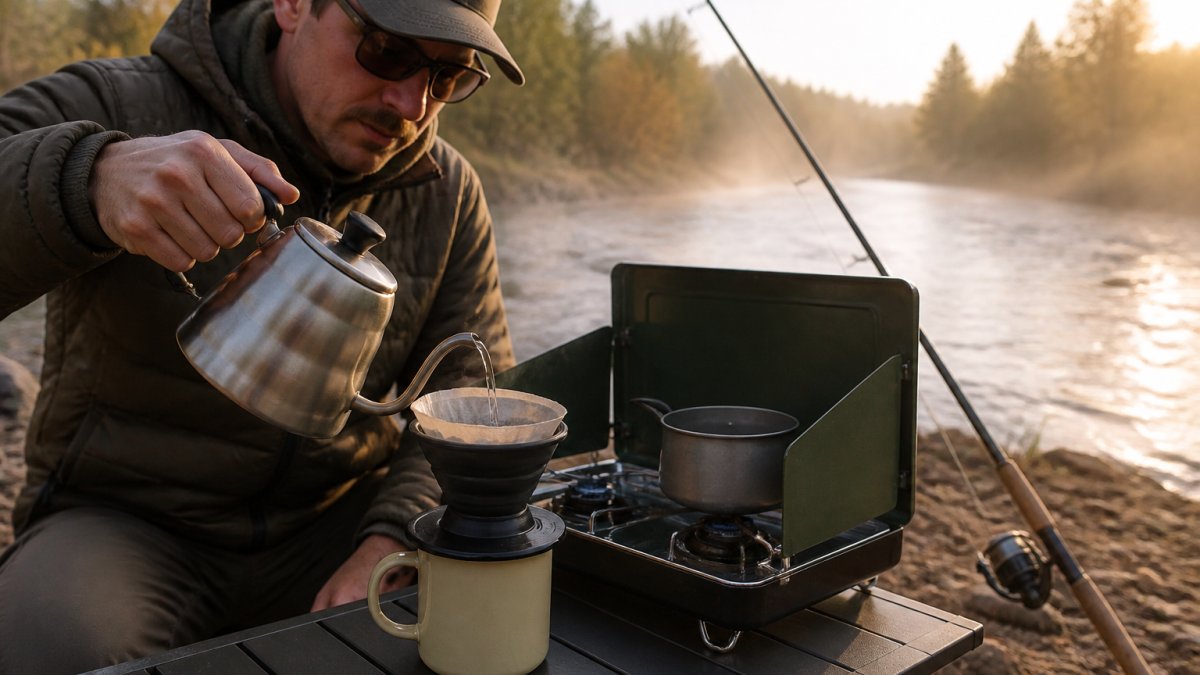
Pre-Heating and Water Temperature
Heat water to 195 to 205 degrees Fahrenheit, this range extracts coffee without scorching it. Without a thermometer, wait about thirty seconds after boiling to reach the right temperature.
Pre-heat your dripper and mug with a splash of hot water. This keeps your finished coffee hot longer. Discard the water before adding grounds.
Steps:
- Heat water over your camp stove
- Check temperature (aim for 200°F)
- Pour a small amount into your dripper to warm it
- Empty the water into your mug
- Let the dripper sit for five seconds before adding grounds
Cold equipment pulls heat from your coffee. Pre-heating solves this problem.
The Bloom Phase
The bloom is the first thirty seconds of brewing. Pour just enough hot water to saturate the grounds. Watch them swell and release gas. This degassing step unlocks flavor.
The bloom opens up the coffee for full extraction; without it, your cup tastes flat and weak.
Pour slowly in a circular motion. Wet all the grounds evenly. Stop when the water just covers them. Wait thirty seconds.
Main Pour and Extraction
After the bloom, pour the remaining water in slow, circular motions for about two minutes, for a total brew time of three to four minutes.
Pour in stages:
- First pour: thirty seconds for bloom
- Second pour: one minute of steady pouring
- Final pour: one minute of slow pouring
- Let it drip completely (thirty seconds)
Keep the water level in your dripper consistent: drain too fast and your coffee tastes weak, too slow and it tastes bitter.
Even saturation during pouring means even flavor; uneven pouring creates weak and bitter spots in your cup.
Choosing a Portable Pour-Over Coffee Maker for Camping
Most camping coffee guides tell you to "pick something lightweight" and stop there, useless advice when you're counting ounces on a multi-day trip. Here's the breakdown backpackers actually need.
The Four Dripper Styles and What They Weigh
| Style | Typical Weight | Packed Volume | Best For |
|---|---|---|---|
| Collapsible silicone cone | 2-4 oz | Folds to about 1 inch thick | Ultralight backpacking, solo trips |
| Rigid plastic cone (V60-style) | 3-5 oz | Fixed cone shape, roughly the size of a fist | Car camping, base camps |
| Stainless steel cone | 5-8 oz | Fixed cone shape | Durability, frequent use |
| Cloth or mesh filter (no cone) | Under 1 oz | Stuff sack size | Absolute minimum weight |
A collapsible silicone cone plus a paper filter is the lightest complete setup that still produces a clean cup. A rigid plastic cone weighs a hair more but sits more stably and doesn't flex when you pour. Stainless steel survives being tossed in a pack but adds weight and gets hot to the touch.
The Full Kit Weight
A realistic solo pour-over kit breaks down like this:
- Dripper: 2-5 oz
- Paper filters (10): under 1 oz
- Hand-crank burr grinder: 8-16 oz
- Mug: 4-10 oz
- Kettle or pot with spout: 6-14 oz
Total: roughly 1.5 to 3 pounds, depending on whether you carry a dedicated grinder and kettle or repurpose your cooking pot. Pre-grind at home and you drop the grinder entirely, cutting the kit to roughly 1 to 2 pounds.
Barracuda Bold (French Roast) →
Features That Actually Matter in the Field
- Stability on a mug. A cone that wobbles will tip. Look for a wide base or a silicone grip ring.
- Filter compatibility. Standard #2 cone filters fit most collapsible and rigid cones. Confirm before you buy, odd-sized filters are hard to find on the trail.
- Heat resistance. Silicone handles stay cool; bare metal does not. If you go stainless, plan to hold it with a bandana.
- Nesting. Some cones nest inside a mug or pot. That saves real pack space.
What to Skip
Ceramic drippers look great in photos but weigh 10-16 oz and crack if dropped. Glass is worse. For camping, silicone, plastic, or stainless steel are the only sensible choices.
Weigh your full kit on a kitchen scale before you pack it, knowing your real number is the difference between a comfortable pack and a miserable one.
How to Clean a Camping Coffee Dripper in the Field
Cleaning a dripper at camp is quick, but how you handle the grounds and rinse water matters, for your gear and the site you leave behind.
Field Cleaning Steps
- Tap spent grounds into a dedicated waste bag. Do not scatter them around the campsite.
- Rinse the dripper with a small amount of clean water.
- Wipe the inside with a microfiber cloth or bandana.
- Air dry before packing to prevent mildew.
Without running water, keep a small dedicated container of clean water for rinsing, boil or filter it first if pulled from a natural source.
For stubborn buildup, soak the dripper in hot water for five minutes and scrub with a soft cloth. Avoid abrasive scrubbers that scratch silicone or plastic.
Disposing of Coffee Grounds the Right Way
This is where most guides get vague: coffee grounds are organic, but that doesn't mean you should dump them at your site.
- Pack them out. Used grounds are wet, heavy, and messy, but they belong in your trash bag, not on the ground. This is the simplest and most defensible choice.
- Bury only where allowed. Some land managers permit burying organic waste in a cathole 6-8 inches deep and at least 200 feet from water, trails, and campsites. Check your specific area's rules first, many do not allow it.
- Never dump into water. Grounds and rinse water should never go into streams, lakes, or rivers, even "just a little."
- Rinse water counts too. Pour used rinse water through a strainer to catch grounds, then scatter the strained water well away from camp.
Following Leave No Trace principles means leaving the site as you found it. Coffee grounds attract wildlife, stain rocks, and break down slowly in cold or dry climates.
Cold-Weather Cleanup
In freezing temperatures, water in your dripper can ice up between brews. Two adjustments help:
- Clean immediately after brewing while the dripper is still warm. Waiting even ten minutes in subfreezing air makes grounds harder to remove.
- Keep your rinse water in an insulated bottle so it doesn't freeze solid overnight.
Water Quality for Rinsing
If you're rinsing with stream or lake water, filter or boil it first, the same standard as drinking water. Residual pathogens on a dripper you'll use again the next morning are an easy problem to avoid.
A two-minute cleanup protects your dripper, your next cup's flavor, and the campsite, dried residue creates off-flavors, and left-behind grounds create a mess for someone else.
Troubleshooting Common Pour-Over Problems at Camp
Brewing at camp introduces variables that don't exist at home. Water temperature fluctuates, wind pulls heat from your kettle and mug, and altitude changes how hot your water gets. Here's how to fix the most common problems.
Coffee tastes weak or watery
Your grounds are too coarse or your pour was too fast.
Coffee tastes bitter or over-extracted
Your grounds are too fine or your water was too hot. Grind coarser next time.
Water drains too quickly
Grounds are too coarse. Use medium-fine grind.
Water drains too slowly
Grounds are too fine. Use a coarser grind.
Coffee is cold by the time it finishes brewing
Pre-heat your mug and dripper. Use hotter water (closer to 205°F). Cold-weather brewing requires patience, so shield your setup from the wind while you pour.
According to outdoor brewing guides from REI, altitude above 5,000 feet requires adjustments to water temperature and brew time.
Brewing pour over coffee while camping doesn't have to be complicated. At Reel Good Coffee, our small-batch, freshly roasted blends are made for mornings like these. If you want a camp cup without the caffeine, try REEL RELAXED (Peruvian Decaf).

Frequently Asked Questions
What is the best camp pour-over coffee ratio?
Use a 1:16 coffee-to-water ratio as your baseline, that's 1 gram of coffee to 16 grams of water. For easier camp math, aim for about 2 tablespoons of medium-fine ground coffee per 6 ounces of water. Adjust slightly stronger or weaker based on your grind size, water temperature, and personal taste. Darker roasts like Barracuda Bold tend to extract a little faster than lighter roasts, so you may need slightly less brew time.
How do you keep coffee grounds out of your cup when camping?
Use a quality pour-over dripper with a tight-fitting design and thick filter paper, paper filters trap fine sediment better than metal filters. Wet the filter first to help it seal against the dripper walls. Pour slowly and deliberately to control flow rate and prevent grounds from escaping through gaps. If grounds still slip through, pour your first cup back through the dripper, or use a fine mesh strainer as a secondary catch before drinking.
Can you make pour-over coffee over a camp stove?
Yes, pour-over works perfectly over a camp stove. Heat water in a kettle until it reaches 195-205°F (just off boiling), then remove from heat for 30 seconds before pouring. A gooseneck kettle gives you better control over pour rate and prevents splashing. Pour-over is a good fit at camp because it's faster than a percolator, produces a clean cup with no sediment, and requires minimal cleanup, ideal for early morning fishing trips when you need sharp focus on the water.
What grind size works best for camp pour-over coffee?
Use a medium-fine grind for pour-over at camp, finer than drip coffee but coarser than espresso. This grind size allows even extraction in 2-4 minutes without over-extracting or producing bitter tannins. If your brew tastes bitter or muddy, coarsen the grind slightly. If it tastes weak or sour, go finer. Burr grinders give you more consistent particle size than blade grinders, which matters for reliable extraction in the field.